
Secrets of MicroPython: Fun with Neopixels!
In our very first MicroPython tutorial, we learned how to blink an LED but we could only turn it fully on or off - we didn't have the ability to change its brightness or colour. What if we did? You could create the most fantastic shows of light and colour - using Neopixels!

(If this is your first time here, check out my first MicroPython tutorial. Use it to get acquainted with the Wokwi simulator interface so that you are prepared to dive into this tutorial).
In our very first MicroPython tutorial, we learned how to blink an LED but we could only turn it fully on or off - we didn't have the ability to change its brightness or colour. What if we did? You could create the most fantastic shows of light and colour! You could harness this knowledge to light up an underground rave, or an Indian wedding, or your sick new mechanical keyboard.
You can make all the colours of the rainbow by just mixing red, green and blue light in the right proportions. But how exactly do we "mix" the colours? That's where the magical Neopixels - also fondly known as WS2812Bs - come in. A Neopixel actually has 3 LEDs inside it (red, green and blue) and a teeny-tiny integrated chip that can be commanded to set each of these 3 LEDs to a different intensity. By setting the 3 intensities appropriately, we can produce any colour at any saturation and brightness. Neat!
Luckily for us, we don't quite have to fine-tune these intensities by hand. There is an awesome Neopixel library available for the Raspberry Pi Pico which we can use - this allows us to dive right into creative coding instead of fiddling with the command protocol details. The library is open source and can be found on blaz-r's github repository.
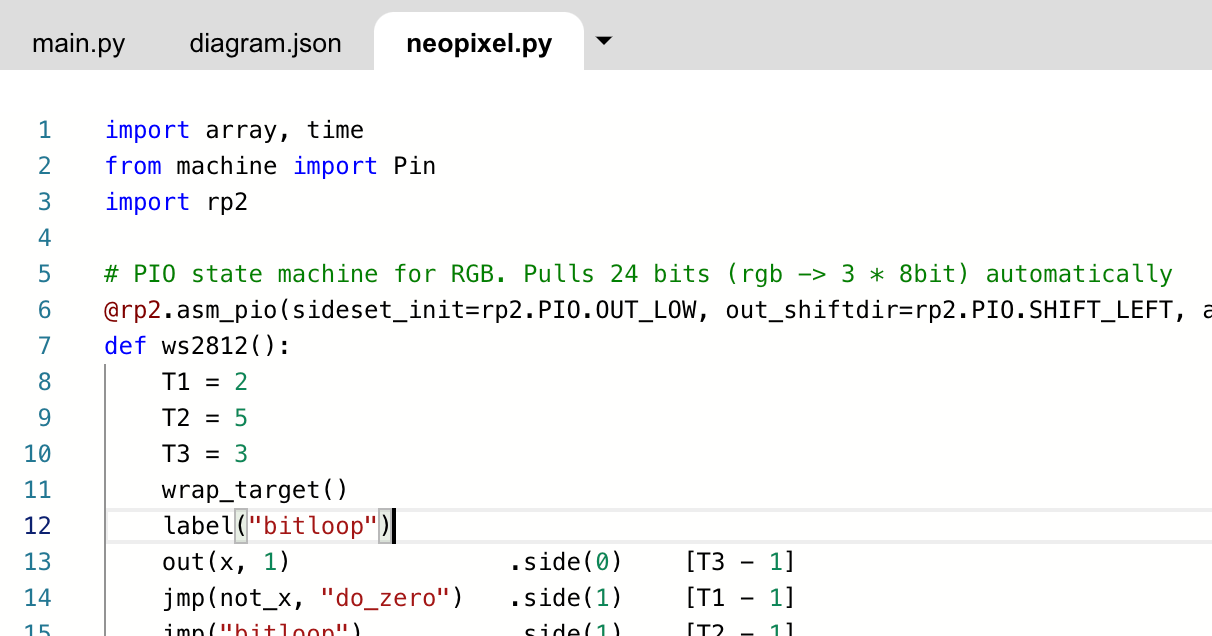
In that repo, we are mainly interested in the file neopixel.py. Let's start a new MicroPython project in our favourite simulator, Wokwi. We want to bring in the code from neopixel.py so we can use this library. Above the code editor, click on the little arrow on the right and select 'New File'. Name it neopixel.py and copy in the contents of the file from the github repo. After you're done, your editor should look like mine below.
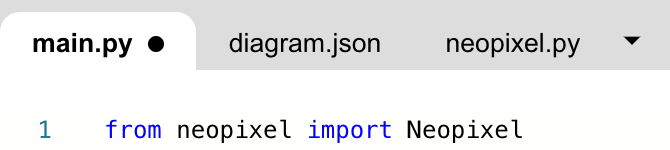
Go back to the file main.py where we will be writing our code. Let's start by testing out if the Neopixel library is properly uploaded and available for our code to access. To do this, we will import the library and run the simulation. Type in the following code to import the Neopixel library and then press 'play' in the simulator pane.
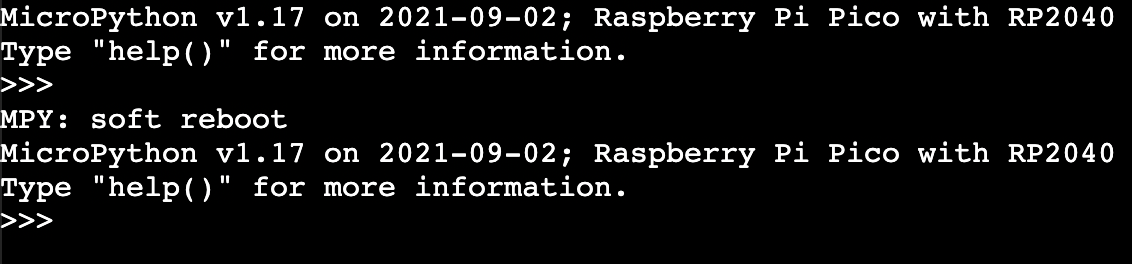
You should see an output similar to the one below, i.e. the code doesn't crash. If you do have issues, please tweet/DM me and I'd be happy to help you out ?
We have one last step before we start blinking rainbow lights - let's add Neopixel hardware to the simulator pane. Click the 'plus' button at the top of the pane and select the Neopixel Ring from the menu. It has 4 pins:
- VCC, which we'll connect to the Pico's 3.3V supply pin (pin 36 on the right side of the Pico's pinout diagram).
- GND, which we'll connect to any ground pin on the Pico.
- DIN, which stands for "Data IN" and needs to connect to any digital I/O pin on the Pico so we can command the Neopixels. I chose pin GP6.
- DOUT, which stands for "Data OUT" and is used for connecting additional Neopixels downstream of this ring (e.g. more Neopixel rings). We don't need to connect this for now.
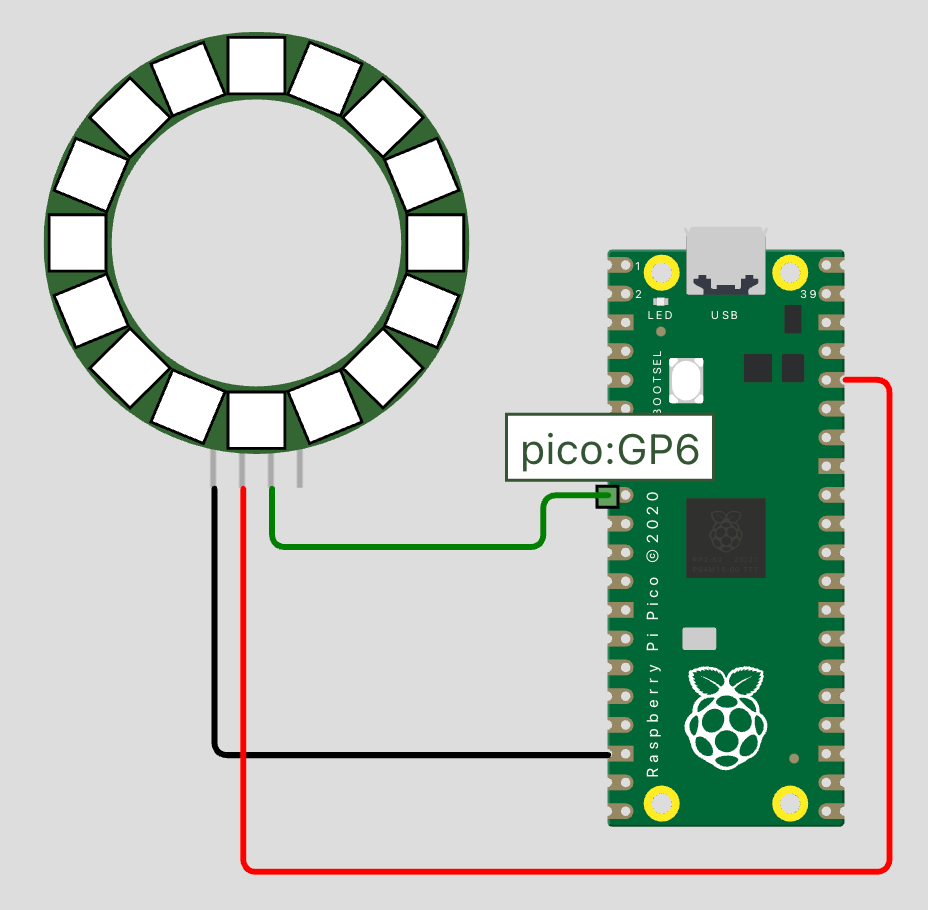
Connect your Neopixel ring to the Pico as shown in the image. We are now ready to start coding! The Neopixel library provides two ways to numerically represent colour: RGB (red-green-blue) and HSV (hue-saturation-value). If you've ever worked with colours in code or in Photoshop before, you may be familiar with these. RGB is intuitive - it requires the programmer to provide an intensity value for each of the 3 colours, and those get added to produce the desired colour. HSV can be harder to understand but I think Wikipedia does a great job of visualizing it.
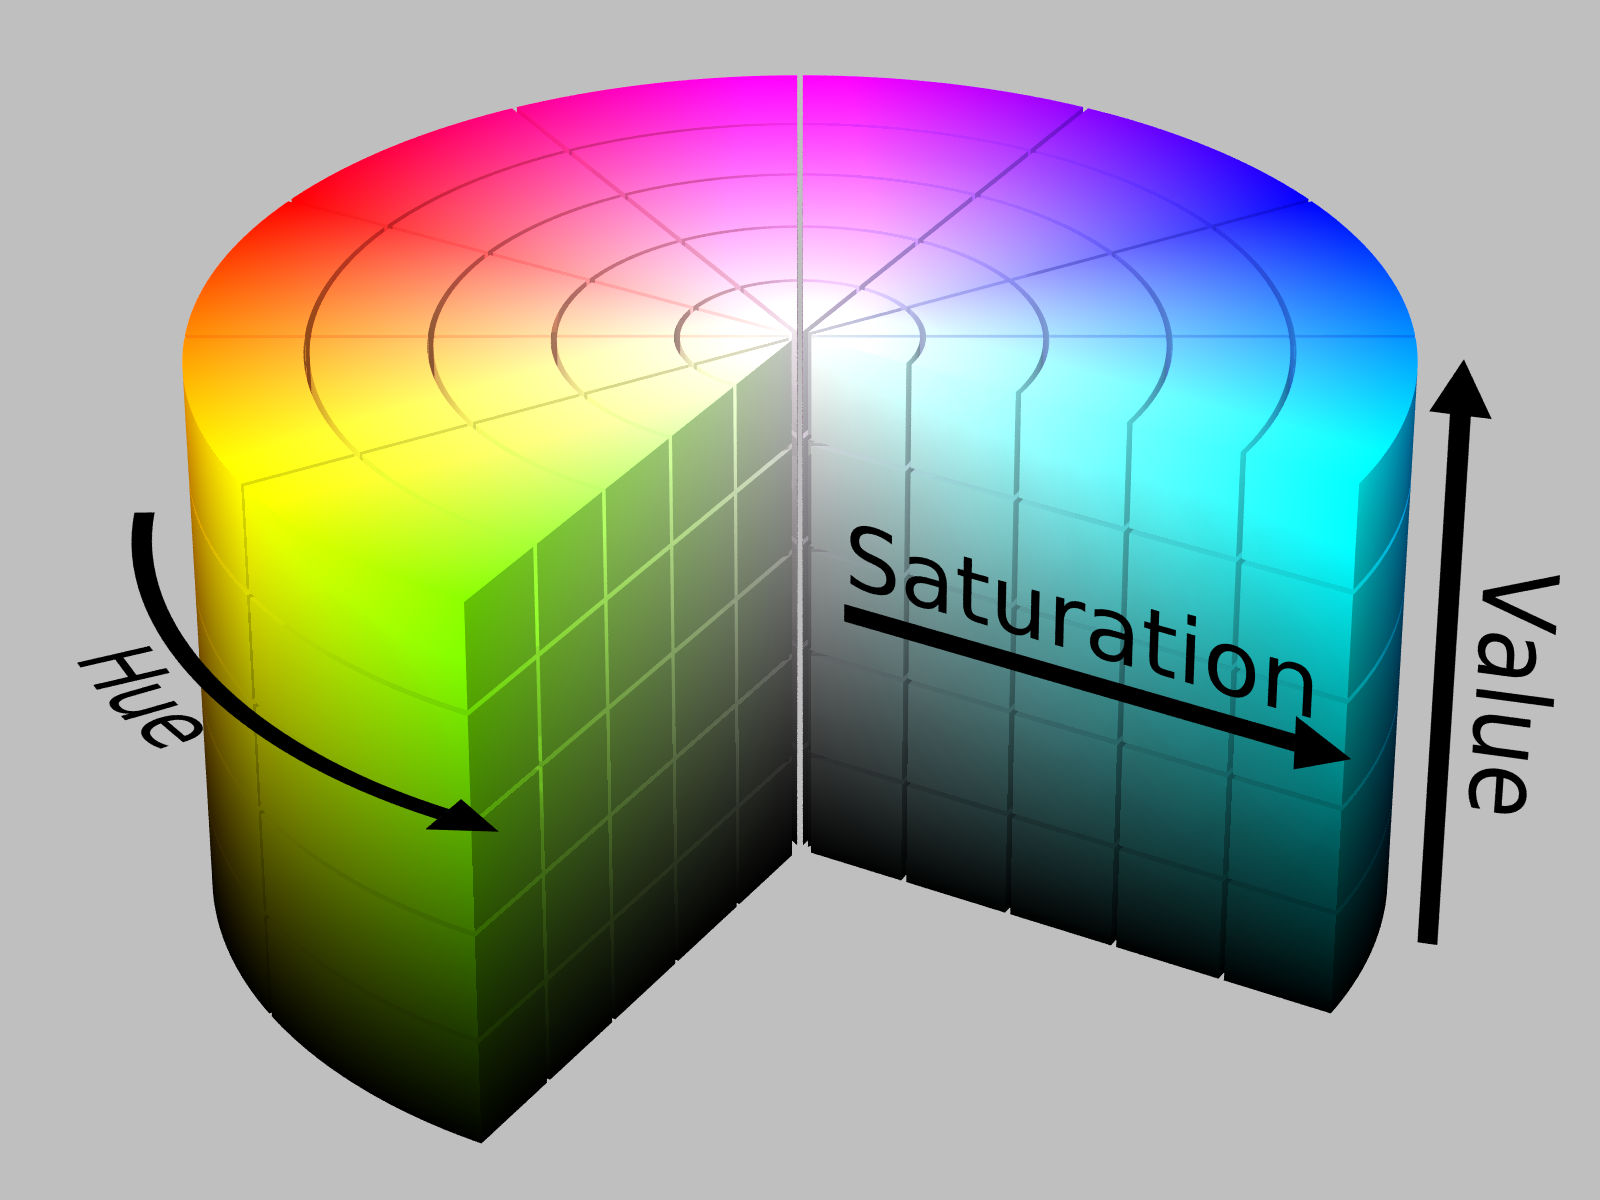
Hue refers to the colour itself as we'd see it in a rainbow, and each colour has a numerical value assigned to it from 0 to 65535. Saturation measures how much of the colour is present, i.e. how blue is the blue or how red is the red, and has a value assigned from 0 for unsaturated to 255 for fully saturated. Value refers to the brightness of the colour, where complete darkness is represented as 0 and full brightness is represented as 255.
Saturation and value seem to have a sensible numerical scale, but how do we know which hue corresponds to which colour? Is red 27, or 34798, or something else? Luckily we have another great visualization from Adafruit to help us.
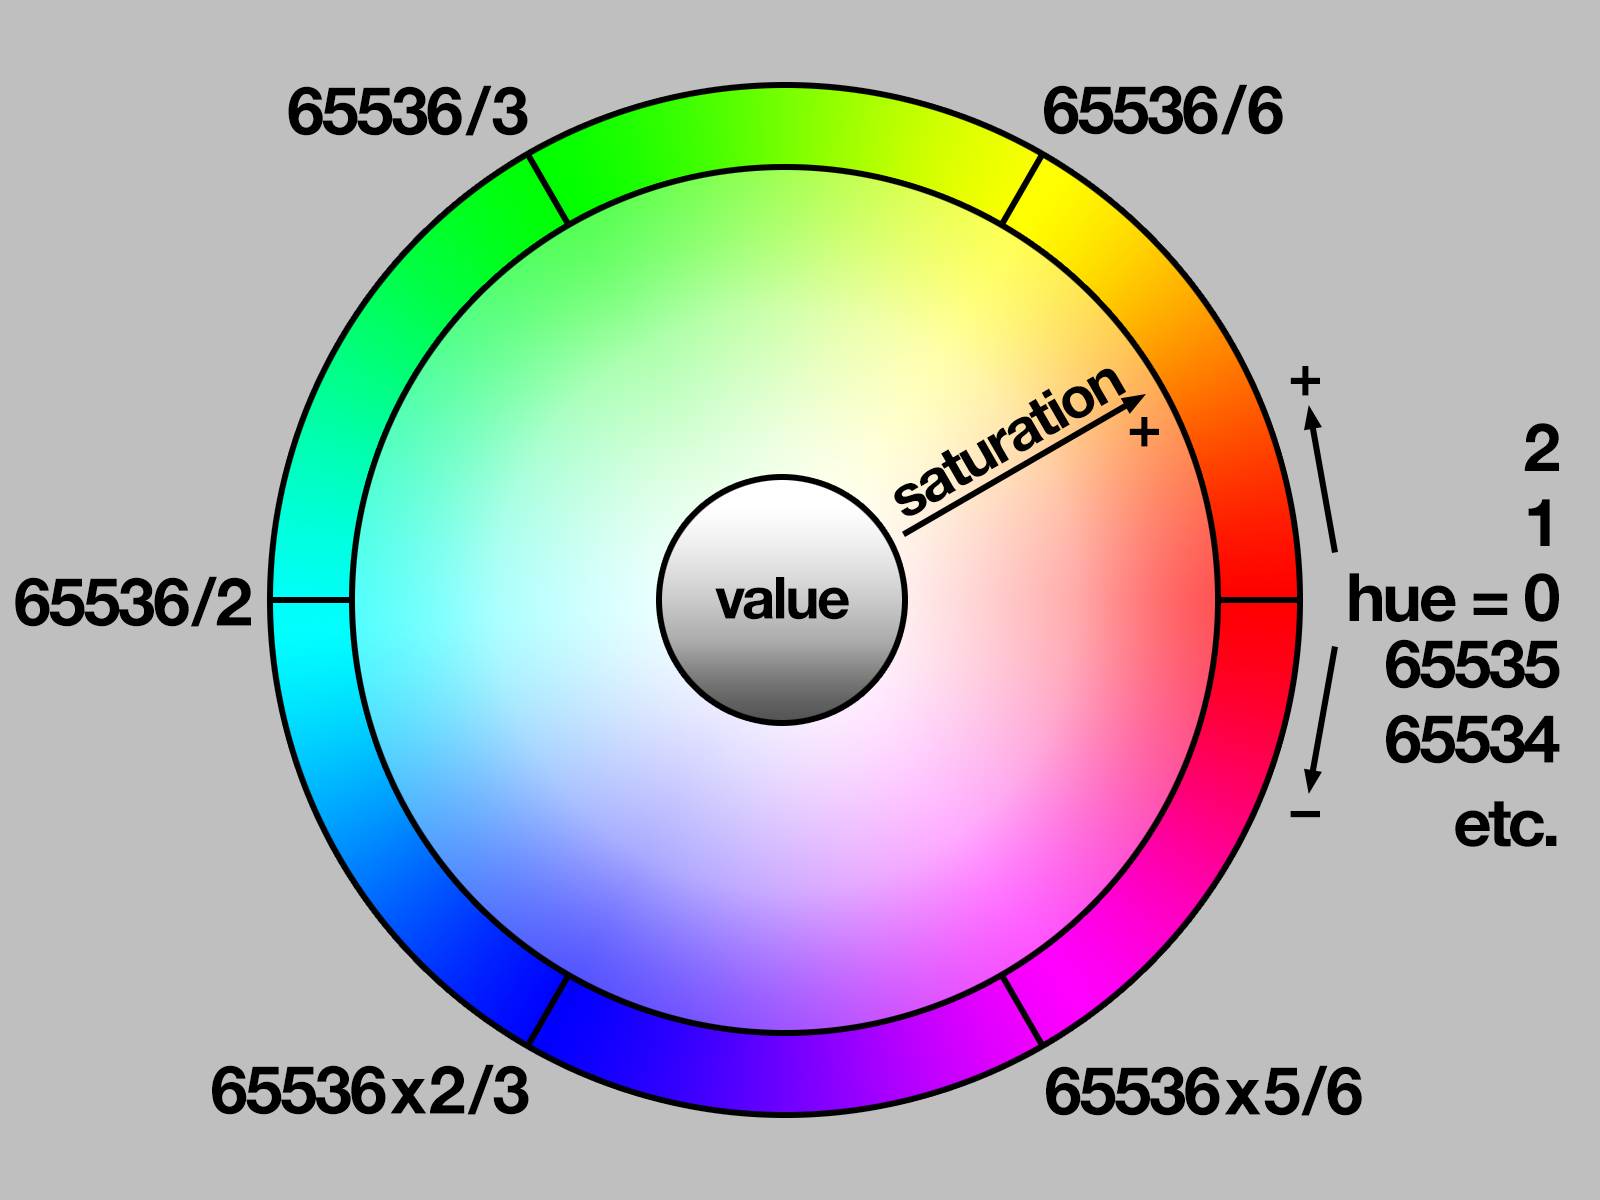
It's as if someone took a rainbow and wrapped it around a bicycle tire (hey, that's another great Neopixel project idea!). We see in the chart that pure red = 0, pure green = 21845 in the top left, and pure blue = 43691 in the bottom left. All the remaining colours lie on the spectrum in between these.
So far this HSV system seems like a more complicated way to represent colour, and you may feeling like cursing me under your breath for showing it to you. But there's a reason I did! When writing Neopixel code with fun patterns, I find it's actually easier to control the Neopixels using HSV colours rather than RGB colours. Since the hue spectrum goes in a circular loop, we can take advantage of it by writing for loops which cycle through the colours and smoothly transition between them. Pretty neat!
Let's try this in the Wokwi editor. As usual, we need the time library to control the rate of our code. We don't, however, need the machine library this time - the Neopixel library abstracts that away for us. We have 16 Neopixels in the ring, and to start we're going to cycle them between red, green and blue so we can check that it behaves as expected. Write the MicroPython code below.
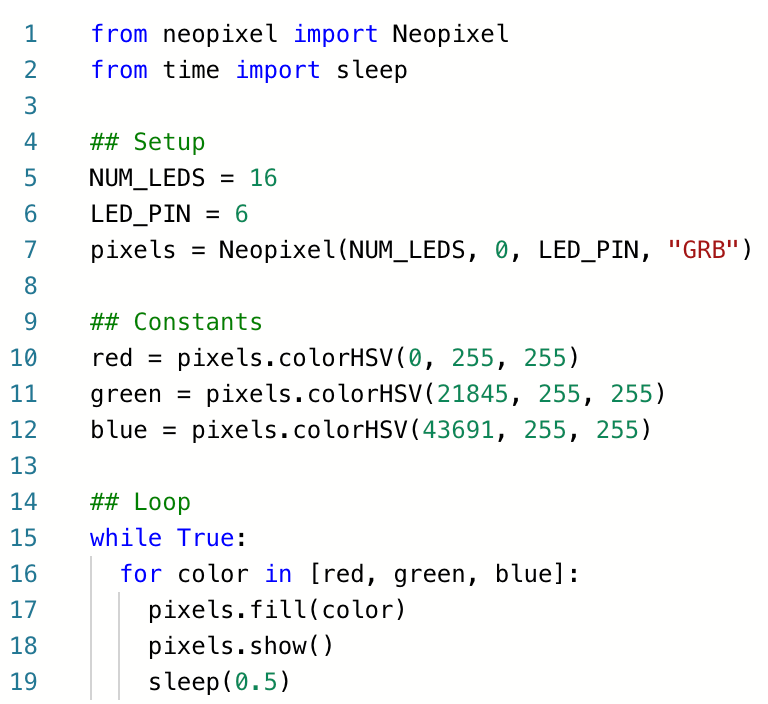
In the setup section, we create a Neopixel object that controls 16 LEDs on pin GP6. The "GRB" refers to the scheme used by the low-level command protocol of the Neopixels, and is different for different brands of WS2812B LEDs that you can find on the market. In the case of the ones in the simulation, the protocol scheme is "GRB".
Next, we define our 3 colours using the Neopixel object. The first number in the HSV colour is the hue, the second is saturation and the third is value. For simplicity I have set the saturation and value/brightness to the maximum for all 3 colours.
In the loop, we 'fill' all the Neopixels with each colour every half second, so it cycles between red, green and blue. Notice on line 18 that we must use the show method in order to actually send the command to the Neopixels. This allows us to write multiple lines of code to set up the colour pattern exactly as we want it before sending it all at once to the ring.
Let's watch it in action! Click the 'play' button at the top of the simulator and watch the ring come alive.
Great, we've just made a tacky storefront sign from the 1990s. If you weren't around back then, you're very lucky. Since this is the 21st century, let's fade smoothly between these colours to get a nice gradient effect instead. Modify your main loop to the one below so that you can loop through all the hues in the spectrum.
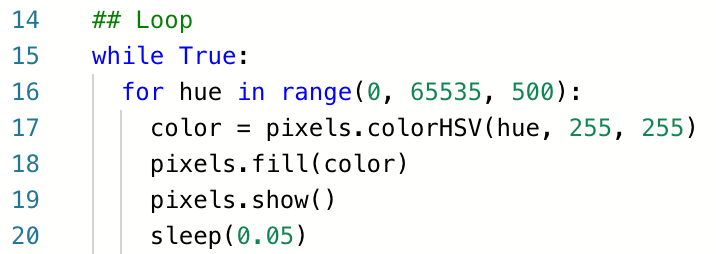
This time instead of having 3 fixed colours to cycle through, we cycle through the entire spectrum. We use the range function in python to create a list of hues from 0 to 65535, in steps of 500. We then fill the pixels with each colour and remember to use the show method to send the command to the Neopixel ring. Notice that the sleep time has been reduced from 0.5 seconds to 0.05 seconds so that the pattern cycles faster through the spectrum. Click 'play' in the simulator to watch this in action!
Our Neopixel ring may not be as tacky as before, but I think it's still about as stylish as a child's light-up sneakers from the early 2000s. It could do with better animation design. Now this is a MicroPython coding tutorial, not an installation-art course, so I'll leave the creativity to you! What can you build with the new knowledge you have? I'd love to check it out!
I've embedded today's simulation below so you can play with it - enjoy!
Also, one important feature of Neopixels/WS2812Bs is that they're individually addressable. This means that we can set each individual pixel to a separate colour - they don't have to all be the same colour! We will get into that in the next tutorial and we'll have fun making even more stylish colour patterns. Until then, if you have any questions, feedback, or just want to chat, just hit me up on my twitter ? If you'd like to be notified of new tutorials, click Follow/Subscribe below and they'll be in your inbox once a week ? Sayonara!